Tuesday, August 31, 2010

Kimmy's Cake Balls!

I got this recipe from one of my friends back in Nashville last year, her name is Kim, so I took it upon myself to name them Kimmy's Cake Balls!  She should really write a cook book because she is a fabulous cook! 

I will start off by saying this recipe is very easy and very time consuming so make sure you have plenty of time.  The 1st time I tried making these was a disaster because I tried to rush the process!  This was my 2nd attempt and they turned out much better.  I also want to appologize for the quality of the photos...all were taken with my phone because I didn't have my camera with me. 

This recipe is endless as far as flavors to use.  I used yellow cake with chocolate icing and chocolate bark (my husbands favorite) but you can also use red velvet cake with cream cheese icing and white chocolate bark, strawberry cake with cream cheese icing and chocolate or white chocolate bark, white cake with white icing and chocolate bark, etc. You could also use homemade cake/icing combinations as well!

You will need:
1) 1 box of cake mix (your choice, I used yellow cake because it's my husbands favorite)
2) 1 can of icing, I want to say its 16 or 16.2 oz (your choice, I used chocolate)
3) 2 16 oz bags of chocolate bark (your choice, I used chocolate)

**Tip...Kroger now has chocolate bark that includes a container for melting so it makes it much easier.  I would still recommend pouring it into a bowl before dipping your balls only because its easier and less messy if you have a deeper container.


1st - Bake your cake as directed and let cool. 
2nd - Once the cake is cool, pour icing into bowl and crumble cake over it.  With clean hands mix the cake and icing together. 


It will look something like this (color will vary depending on combination used)


3rd - Place cake/icing mixture in freezer for about 30 minutes.  It must be cold enough to withstand the warmth of your hands and the warmth of the chocolate.  If you choose to refrigerate, I would leave in for 1-2 hours. 

4th - Line a cookie sheet with wax paper.  Melt 1 bag of chocolate and take 1/2 of the mixture out of the freezer. Add 1 teaspoon of vegetable oil to the melted chocolate and mix in.  This helps thin it out and makes it easier to work with. 

5th - Start rolling the cake/icing mixture into balls.  Size is totally up to you.  I prefer to do them smaller because they are easier to dip.  Take a toothpick or fork and dip the ball into the chocolate, once covered place on the wax paper.  Obviously, you will have a hole in the top of your ball from the toothpick so spoon a little dab of chocolate onto the hole to cover it up.  You simply continue this process until you are left with an empty bowl.  1/2 of the mixture makes several dozen balls so you may or may not decide to freeze the remaining portion.  If not start with step 4 and continue. 


Once they are dry (let dry on counter), they should look something like this...


You could also drizzle some white chocolate bark on the top to add some color.  My cake balls certainly arn't the prettiest things but my oh my are they yummy!  The look reminds me of chocolate truffles.  The inside is extremely moist and gooey and so so good! Enjoy!

Thursday, August 26, 2010

Decorative Jute Balls

Ok so the inspiration for my first project came from V and Co  http://www.vanessachristenson.com/2009/08/tutorial-pottery-barn-looking.html

Decorative Balls are so popular right now and oh so expensive.  So when I saw this post I knew I had to make some. 

You will need:
1) Styrofoam Balls - any size of your choice (mine were a package of 2 at walmart for $3.47)
2) Jute or Twine (94 yards of Jute at Big Lots for $2.30)
3) Hot Glue (already had on hand)


Start coiling one end of the jute (sorry I didn't get a great photo of this) and hot glue to the ball.  Once that part is dry, continue to hot glue the ball and wrap the twine.  This part can get very tedious because you can't really do more than 1-2 wraps at a time because the glue dries so quickly and because it can get very messy.  Continue all the way around the ball.  FYI - the hardest part is going around the center of the ball so you need to be extra careful here.  Once you are to the other end of the ball coil that end, as you did the first end and glue it down.  Be sure it is good and dry before letting go and you may even want to apply some pressure. 


Ta-Da!  You have a very cute decorative ball.  These look great in vases, bowls, birdcages, etc.  And you don't have to break the bank to get that pottery barn inspired look!


I am currently working on some smaller ones, painted ones, and even experimenting with different things to glue on them.  I will be sure to post when I am done!


Blog Mini-Makeover

Ok, so because I love to make things I am going to be changing the blog up a bit.  I still haven't thought of a name I love that incorporates everything that defines what I am doing so for now it will remain the same.  I am going to continue blogging about our everyday life as well as DIY projects along with a few recipes here and there.  Some ideas I get from you guys and others are my own...I will defiantly give credit where credit is due! 

When I discovered blogging some 4+ months or so ago it really inspired me to get back into the crafting scene.  I LOVE to craft, decorate, design, paint, plan, cook, organize, etc. I'm not sure why I didn't think of it before.  Or maybe I did and just had too many excuses!  Without further ado...Enjoy!

Wednesday, August 25, 2010

Orange Beach 2010

Well we just returned from a mini vaca to Orange Beach.  It was an extra special trip because we got to go with some great friends of ours, April and Jimmy http://www.aprilandjimmyhope.blogspot.com/ and did I mention it was Briley's 1st vacation!  She LOVED every minute of it.  She is such a water baby anyway, but never had I imagined she would love it as much as she did.  She only got a little cranky on the way up there one time.  She was a little ill off and on throughout the trip, i'm guessing it was a mixture of lack of sleep, teething, and being in a new place but all in all it was great.

The day we arrived, we went to the pool.  We got Briley one of those floatation swimsuits...big mistake! 1) it was uncomfortable, 2) it didn't work, and 3) it was a nightmare getting off.  I do not recommend these to anyone!  Anyway, the boys went to the grocery store after pool time and we grilled out that night. 

The next day we spent at the beach! Briley didn't know what to think of the sand at first but quickly warmed up to it! Of course she loved the ocean (as she calls it the pool).  We really enjoyed finding seashells together!  I am so happy we decided to purchase a large umbrella and a tiny pool for her to sit in.  These things came highly recommended by people I know.  We were able to keep her in the shade practically the entire time and she loved being able to sit in the little pool.  It kept her cool and she could splash!  That night we went to dinner at Lu Lu's (Jimmy Buffet's Sister's restaurant).  I will say I loved the ambiance but what I ordered was not the best eventhough the menu read "bestseller".  Whatev! 

The next day was spent at the pool.  Again, another awesome day!  We ended up finding Briley some floaties in her size the night before so she was able to float a little bit on her own.  We tried to teach her how to jump into the pool but she didn't quite catch on to that.  After a long day at the pool (and when I say long I mean 3 hours because that was the max we could stay out with her) we took some pictures on the beach and made lasagna and strawberry pie for dinner!  We were fortunate enough to run into a beginner professional photographer on the beach who wanted to take some photos of us (mainly of Briley).  She should be sending us a CD in the next few days so hopefully they turned out well. 

The next day we had planned on going to the tanger outlet mall and then to the beach but it stormed for most of the day so we only went to the mall for a little while.  We ended up sitting in the room most of the afternoon because of the rain but we were able to go out to the beach and pick seashells and let Briley get in the ocean one last time.  After that we met the same photographer lady on the beach for a few more pictures of Briley (she specializes in children) and then went to dinner at Cotton's (I think is the name).  It was a seafood and steakhouse.  Pretty good and pretty pricey but it was nice!  After that, it was time to head back to the condo and pack everything up.  We left around 6:30am the next morning and arrived home Sunday afternoon. 

It was defiantly sad leaving because I love the beach so much.  Life is so carefree when your on vacation and there really isn't a schedule.  It was also very sad because I know it may be a while before we get to see April and Jimmy again and that makes me super sad :o(  I think we will be making a trip to see them very soon!  Briley has been calling for April everyday since we returned home (sounds more like apple).  Its so sweet!  I was so impressed with how well she did with them.  she has been crying everytime Michael or I leave the room but she didn't do that once while we were there!  It was amazing! 

The only downside of the vacation is we all ended up with terrible congestion the minute we got there.  Not sure what brought it on.  Despite feeling horrible most of the time we were there, we all tried to live it up and have fun.  I know I wasn't letting anything get me down! And #2 Briley didn't sleep well at all, minus the 1st night we were there.  Not sure what the reason was as she typically does fine when she sleeps in the room with us.  The last few nights we ended up putting her in the hallway right outside our door.  It helped some but she still didn't sleep sound. 

The trip was a much needed getaway and I  can't wait to start planning our next vacation!! Enjoy the photos!

checking it out

about to hop in the pool (this was the foam swimsuit thing - do not buy!)


great view


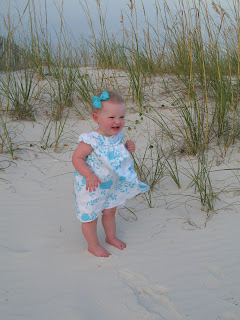
toes in the sand for the 1st time!


this is so cool


our condo and our set up to the left

this is the life!


April and Jimmy
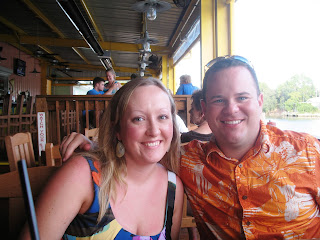
Terri and Michael

say cheese! poor thing...we were eating outside and she was hot!
too hot too trot!


she loved this metal sun rug

big girl with her floaties!


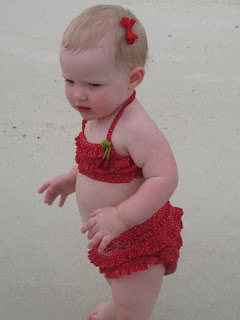
Beach Babe!
Smores Goldfish! Both our favorites!

 
The Girls!

 
Swimming with dada inside
she loved this beach ball!
our non-beach view from the front door - still pretty nice!
photo shoot!


ready to go out and play!

 
last day at the beach :o(


she was prancing up and down the shore line.  it was priceless!


looking for seashells

last night at dinner...can you tell she's not in the best mood?!?

headed home and thank GOD for portable DVD players!!